Last spring, a friend of mine gifted me some of her sourdough starter. Such is the nature of a sourdough starter that I have been baking pretty much every week so I could make room to feed my microbial friend "Buddy" additional flour, water and sugar.
I have been questing in the course of this weekly baking adventure to approximate what I think of as a good, artisan sourdough bread.
Good, of course, can be in the eye of the beholder. What I have been after is a complex flavor, a crust which is crispy and sufficiently done to develop plenty of caramelized, toasty flavors, an open and almost translucent crumb, with the inner surfaces of the bubbles appearing glossy.
I am getting there.
There are several "tricks" or techniques that I have learned along the way.
The first is using a fairly wet dough.
Much of the texture of the crumb is determined by the moisture content of the dough. Doughs with a lower moisture content tend to have fine, closed grains, a texture like supermarket sandwich bread and in extreme cases a flavor reminiscent of raw flour.
As we journey towards the opposite end of the wetness spectrum and approach a batter rather than a dough, we get loaves such as ciabatta that have very open grains but which tend to spread out fairly flat when baked. That's swell; it makes dandy sandwiches also when cut on the horizontal but it's not exactly what I'm after, too much of a good thing.
So I have settled on a dough that is moist enough to be sticky and appear wet even after kneading, but which still has a little more cohesion than a ciabatta dough. I'll share my basic recipe at the end of this rant.
The second is working out kneading techniques. Wet doughs are not as easy to work with, being wet and sticky and all. The novice mistake is to heavily flour one's cutting board to make handling easier, but that incorporates more flour into the dough, defeating the purpose of the whole exercise.
So I have settled for a fusion of two artisan techniques. The first, which I started with, was working the dough in the mixing bowl rather than on the cutting board. It's an Italian technique in which you use one hand as a dough hook, scoop up part of the dough, and capitalize on its stickiness by stretching it as far as it will go while the other end of the dough sticks to the bottom of the bowl. Give the bowl a 90 degree turn and repeat, for about 15 minutes.
This is a pretty good workout.
But I happened on a wet dough kneading technique touted by bread guru Peter Reinhardt that involves three brief kneadings 30 minutes or so apart, and that has made my life simpler. I still do the Italian grab and stretch rather than Peter's stretch and fold, but now I do my first kneading when I incorporate the flour into my sponge, pour myself a morning cup of coffee, come back after checking e-mails, knead again briefly, take care of some other business and knead a third time before shaping the dough into a ball and putting it in a bowl to rise. I find that the three brief kneadings take less time and yield a better textured result.
A second trick is delayed fermentation. Once the dough is in the bowl to rise, it goes into the refrigerator for a day. The cold slows the rising of the dough, the yeast has to work harder, and in so doing changes the chemical composition of the dough somewhat and produces beneficial effects in both crumb and crust.
A third trick is in the shaping of the dough. Handle it with love, and try to degas it as little as possible.
I like to let my loaves rise in a banneton, aka a brotform. This is a reed or wicker basket which,besides putting some cool patterns on the finished loaf, allows the exterior to dry a little more and form a better crust.
The basket is heavily floured before using to keep the dough from sticking.
this is what it looks like coming out of the banneton - you will notice that there are concentric circular patterns on the surface, from the pattern of the basket.
And the final trick is high-heat baking.
My loaves get 15 minutes at 550 degrees fahrenheit (the highest setting for my oven) and an additional 20 minutes at 425 degrees fahrenheit. A pan of boiling water on the rack beneath the bread helps the bread spring up during the first 15 minutes. At that point, the water pan comes out.
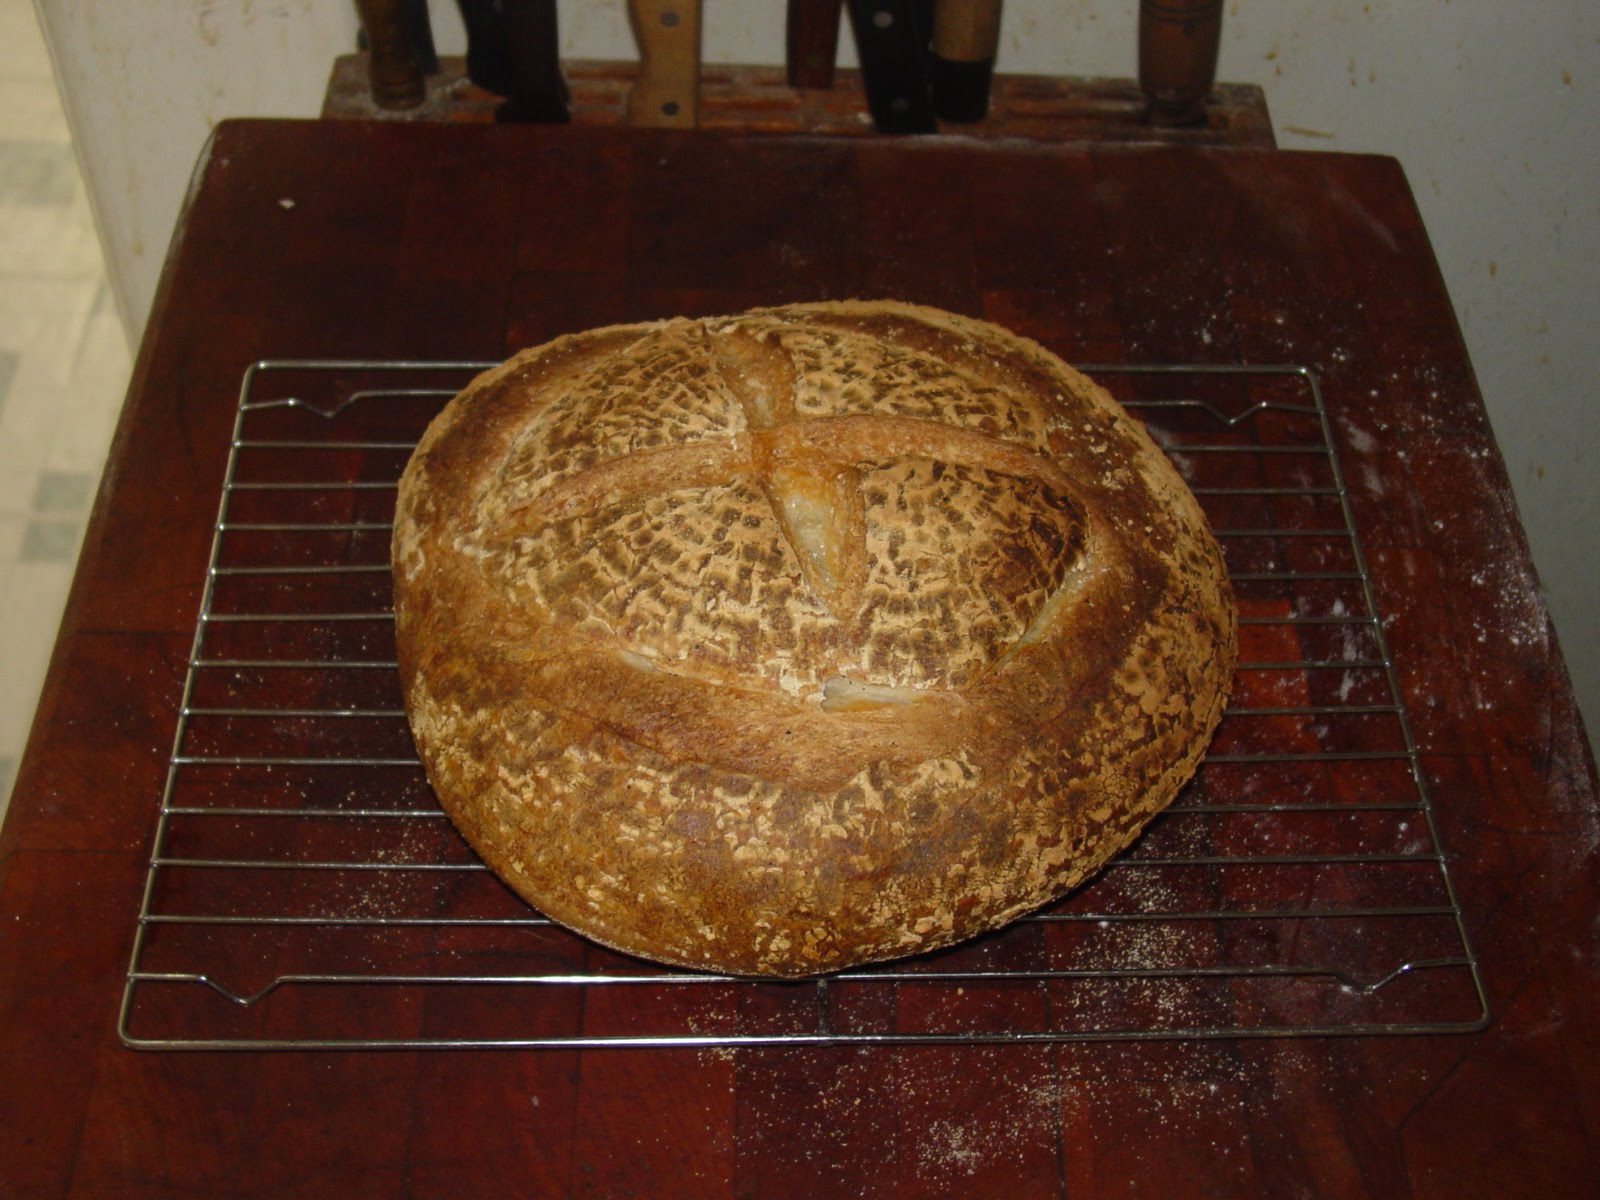
The result is a crust which is dark without being burnt, just about perfect.

My basic recipe is as follows-
Combine four cups of flour, one cup of starter, and three cups of warm water in the evening and let sit out overnight to begin the fermentation. The next morning, add 2 1/2 cups additional flour and one tablespoon each of salt and sugar. Whole grain breads will benefit from an additional half-tablespoon of salt. Proceed as I described above; knead, refrigerate for a day, shape into loaves, allow to double in bulk, bake. Let cool for at least a half-hour before you sample it.
A really nice multi-grain loaf can be made by using whole wheat flour for the sponge and for the additional flour using a cup and a half of spelt flour and a cup of rye flour.
I have been questing in the course of this weekly baking adventure to approximate what I think of as a good, artisan sourdough bread.
Good, of course, can be in the eye of the beholder. What I have been after is a complex flavor, a crust which is crispy and sufficiently done to develop plenty of caramelized, toasty flavors, an open and almost translucent crumb, with the inner surfaces of the bubbles appearing glossy.

I am getting there.
There are several "tricks" or techniques that I have learned along the way.
The first is using a fairly wet dough.
Much of the texture of the crumb is determined by the moisture content of the dough. Doughs with a lower moisture content tend to have fine, closed grains, a texture like supermarket sandwich bread and in extreme cases a flavor reminiscent of raw flour.
As we journey towards the opposite end of the wetness spectrum and approach a batter rather than a dough, we get loaves such as ciabatta that have very open grains but which tend to spread out fairly flat when baked. That's swell; it makes dandy sandwiches also when cut on the horizontal but it's not exactly what I'm after, too much of a good thing.
So I have settled on a dough that is moist enough to be sticky and appear wet even after kneading, but which still has a little more cohesion than a ciabatta dough. I'll share my basic recipe at the end of this rant.
The second is working out kneading techniques. Wet doughs are not as easy to work with, being wet and sticky and all. The novice mistake is to heavily flour one's cutting board to make handling easier, but that incorporates more flour into the dough, defeating the purpose of the whole exercise.
So I have settled for a fusion of two artisan techniques. The first, which I started with, was working the dough in the mixing bowl rather than on the cutting board. It's an Italian technique in which you use one hand as a dough hook, scoop up part of the dough, and capitalize on its stickiness by stretching it as far as it will go while the other end of the dough sticks to the bottom of the bowl. Give the bowl a 90 degree turn and repeat, for about 15 minutes.
This is a pretty good workout.
But I happened on a wet dough kneading technique touted by bread guru Peter Reinhardt that involves three brief kneadings 30 minutes or so apart, and that has made my life simpler. I still do the Italian grab and stretch rather than Peter's stretch and fold, but now I do my first kneading when I incorporate the flour into my sponge, pour myself a morning cup of coffee, come back after checking e-mails, knead again briefly, take care of some other business and knead a third time before shaping the dough into a ball and putting it in a bowl to rise. I find that the three brief kneadings take less time and yield a better textured result.
A second trick is delayed fermentation. Once the dough is in the bowl to rise, it goes into the refrigerator for a day. The cold slows the rising of the dough, the yeast has to work harder, and in so doing changes the chemical composition of the dough somewhat and produces beneficial effects in both crumb and crust.
A third trick is in the shaping of the dough. Handle it with love, and try to degas it as little as possible.
I like to let my loaves rise in a banneton, aka a brotform. This is a reed or wicker basket which,besides putting some cool patterns on the finished loaf, allows the exterior to dry a little more and form a better crust.

The basket is heavily floured before using to keep the dough from sticking.
this is what it looks like coming out of the banneton - you will notice that there are concentric circular patterns on the surface, from the pattern of the basket.

And the final trick is high-heat baking.
My loaves get 15 minutes at 550 degrees fahrenheit (the highest setting for my oven) and an additional 20 minutes at 425 degrees fahrenheit. A pan of boiling water on the rack beneath the bread helps the bread spring up during the first 15 minutes. At that point, the water pan comes out.
The result is a crust which is dark without being burnt, just about perfect.
My basic recipe is as follows-
Combine four cups of flour, one cup of starter, and three cups of warm water in the evening and let sit out overnight to begin the fermentation. The next morning, add 2 1/2 cups additional flour and one tablespoon each of salt and sugar. Whole grain breads will benefit from an additional half-tablespoon of salt. Proceed as I described above; knead, refrigerate for a day, shape into loaves, allow to double in bulk, bake. Let cool for at least a half-hour before you sample it.
A really nice multi-grain loaf can be made by using whole wheat flour for the sponge and for the additional flour using a cup and a half of spelt flour and a cup of rye flour.
Comments
Post a Comment